Powerful Formsort form features you didn’t know about - Part 1

Design & responder behavior tools to enhance your next form
Whether you're a seasoned form user or just dipping your toes into the world of form-based data collection, Formsort has some great features and tricks that will make your form building so easy, you can deploy before you can say poof!
We’re pulling back the curtain to put a spotlight on some of the powerful features we’ve developed to give our clients the best form building experience possible. This topic will be divided into two articles. In this article, we’ll take a closer look at some of the versatile design and responder behavior tools that can level up your forms. In the next article, we’ll cover content tools.
The design and responder behavior features we’ll discuss in this article are:
- Confetti animation
- Customizing question containers
- Dimension variable for responsiveness
- Custom HTML + custom CSS
- Group override style
- Returning responder behavior configurations
So let’s dive right into the cool features you didn’t know you needed:
1. Confetti animation
A fun and engaging animation
Celebrating important moments in a form is serious business. Seriously. Forms, especially long ones, can feel like a never-ending task. Infuse some excitement and highlight milestones in your form by adding confetti with just a few clicks. While confetti isn’t appropriate for all forms, depending on your services and your users’ needs, it can definitely add value when used in the appropriate situations. Some great moments to add confetti are:
- Qualification: Go ahead and throw some confetti when a prospective customer qualifies for your service, as long as it makes sense in the context of your services and is sensitive to the clients’ medical or other known circumstances.
- Product or service match: Similar to qualification, matching a prospective customer to a product recommendation, coach, or service is a milestone that can be celebrated with confetti.
- Completion: You might want to thank responders for completing a particularly involved survey. Confetti would add a nice touch to the thank you message.

How to enable and customize Confetti in forms
Adding confetti to your form is quick and easy. For example, you can create an informational page congratulating a responder for qualifying or completing. Create a step and add a message. Then, click on the step and look in the right panel under the style tab, there will be a toggle “Show confetti in the background.” Turn it on, and go to see the results in the live preview window.
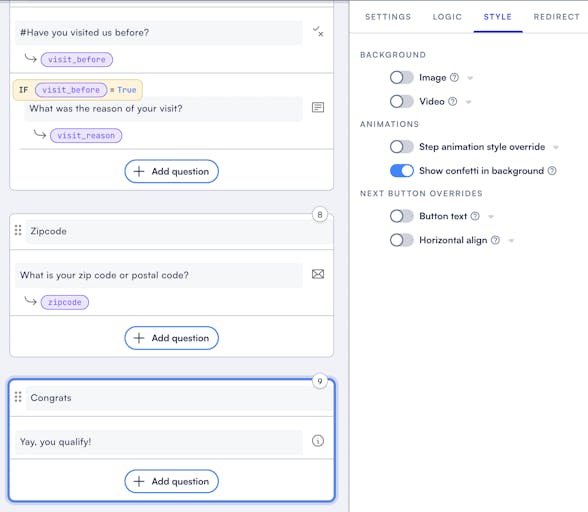
The result is a colorful animation that will overlay your theme. Of course, you can create a customized page design for your confetti page.
2. Custom design question containers
When you want to use different designs for similar type of questions
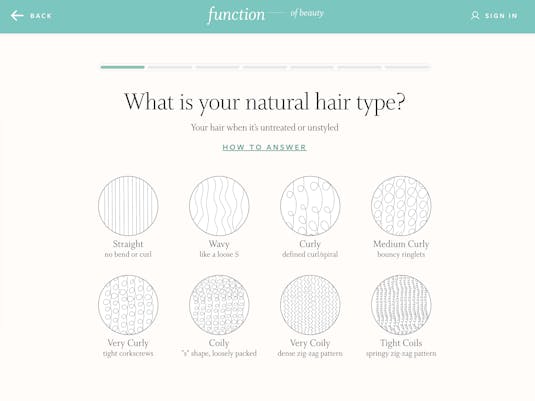
Let’s say you have a long form about allergies with sections on food, medicine, seasonal, and environmental-based symptoms. One way you can differentiate the sections is with customized question containers. Even if you have an overall theme in place for the form, you can essentially create mini-themes for a set of questions in a form with this feature. Specify the appearance and layout of questions in one standout container. Some ways container customization can elevate your form include:
- Interstitials: You can insert unique informational pages within your form using custom designed question containers. Add testimonials, share product information, or display form progress. Create visually distinct and informative interstitials with custom designed question containers to build trust, give breaks, inform, and engage users.
- Engaging assessments: If you're creating quizzes, custom question containers can make the experience more engaging. For example, you can use different container styles for correct and incorrect answers, providing immediate feedback and enhancing the educational value of the form.
- Highlighting required questions: Not all questions are equally important. By customizing the containers, you can draw attention to key questions or sections, ensuring that users pay special attention to critical information or decision points.
Steps to create custom question containers for a unique form design
To create custom question containers, start in Theme -> Containers -> Questions -> Default and click “+Add question style” at the top right corner of the page.
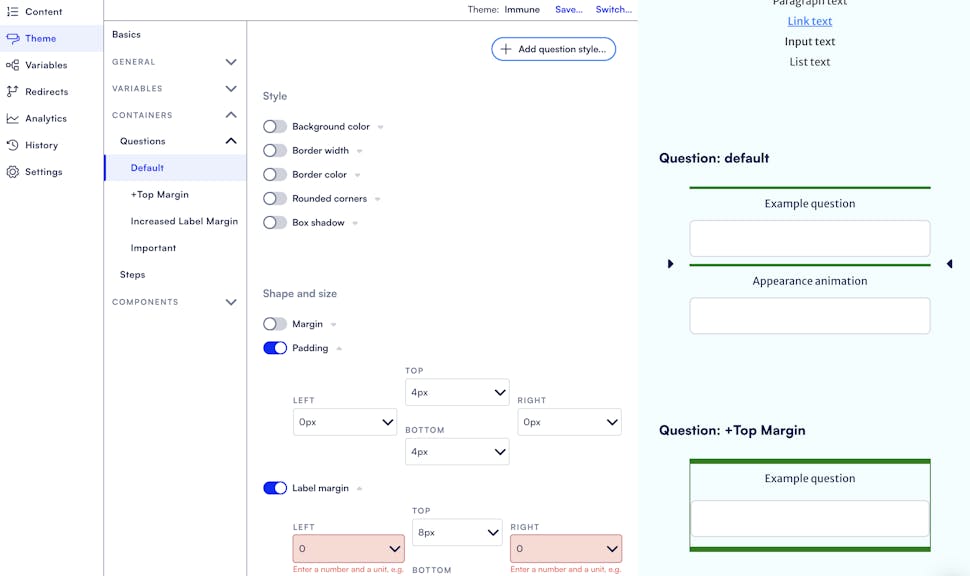
Name and set specifications for the custom container. In the example below, the new custom container named ‘Testimonial’ is set to have a slate background color and rounded corners with specifications set in pixels.
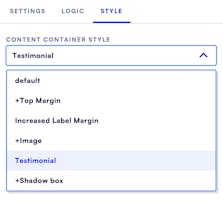
To apply this custom style to a question, go to Content, pick the question you want this style to be applied to. Then within the question’s Style tab, click Question container style and select the custom container you just created.
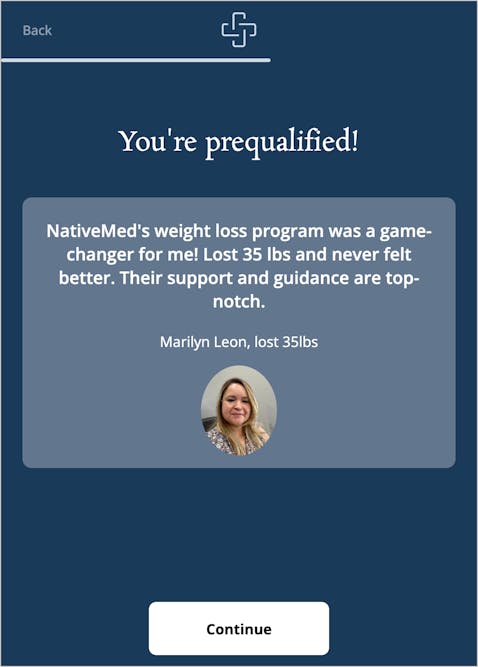
Add text. In the question settings you can also add an image. If the container needs any adjusting, you can navigate easily to the container editing page just by clicking Edit content container styles under the question’s Style tab. You should have something that looks like this:
Watch our How to video tutorial for custom container here.
3. Use dimension variable for responsive design
How dimension variables make form elements responsive
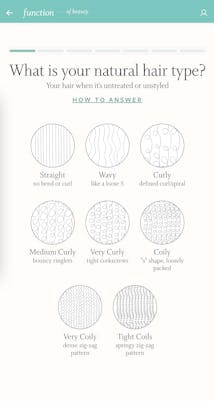
Designing for forms to be equally navigable on phones, tables, and desktop computers doesn’t have to take 3 times the time and effort. With dimension variables, you can design for responsiveness efficiently and simultaneously.
Dimension variables make form elements responsive by letting you define measurements that adapt to different screen sizes and resolutions. When you use dimension variables, the form elements aren’t tied to fixed measurements, which leads to excessively scrolling on mobile screens. They also won’t shrink proportionally, which might reduce some text and images so much, users won’t be able to understand them without zooming.
When you set dimension variables, your content adjusts dynamically to fit the available screen real estate according to your settings.
Creating and implementing responsive units
You want to add padding to a question. on mobile devices you want it to be smaller, on bigger devices you have more space and you want it to be larger.
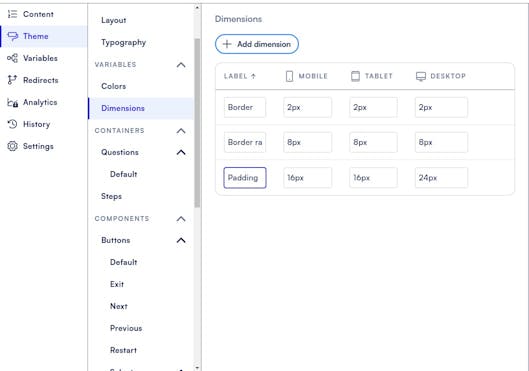
You can add any dimension variables you want, and you can use them in any style setting that lets you set a length input (margin, padding, border, border radius, minimum height, maximum height, rounded corners, and more). Go into your form’s Themes -> Variables -> Dimensions and click +Add dimensions.
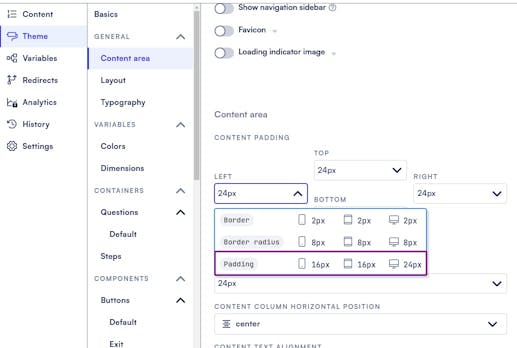
You can apply these dimensions to relevant area(s) in your form by going into Theme -> Content area and selecting the variable you want.
Watch our How to video on dimension variables here.
4. Custom HTML + CSS
Fine tuning your design with custom HTML and inline CSS
If you have a specific design in mind and you can’t get to it using the Formsort style editor alone, you can add custom CSS and HTML to reach your design. Once you’ve set up your form’s overall theme, you can add more personality to it by adding custom HTML and CSS. These features give you the flexibility to go beyond the default design for specific elements.
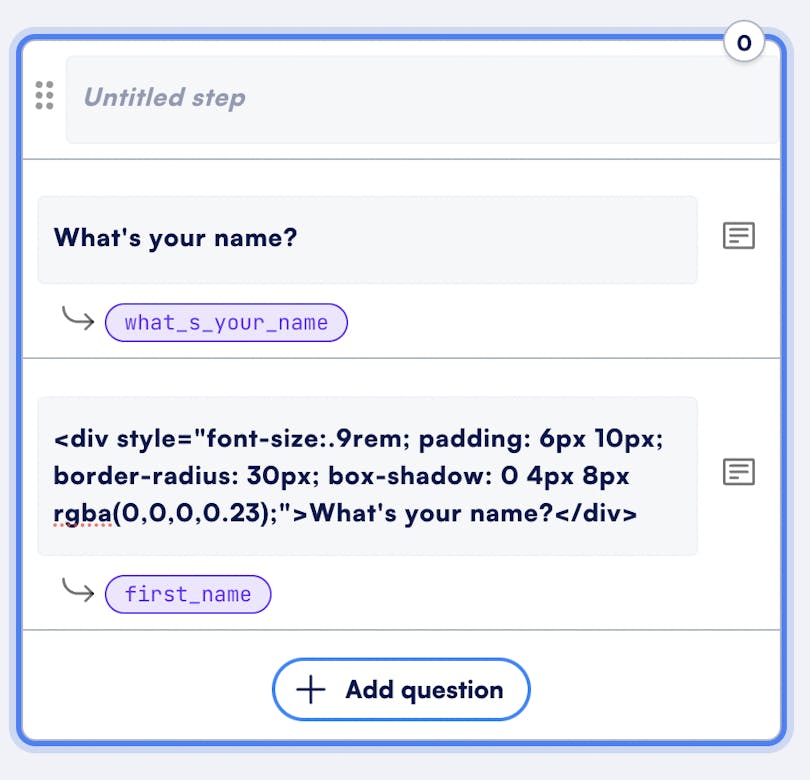
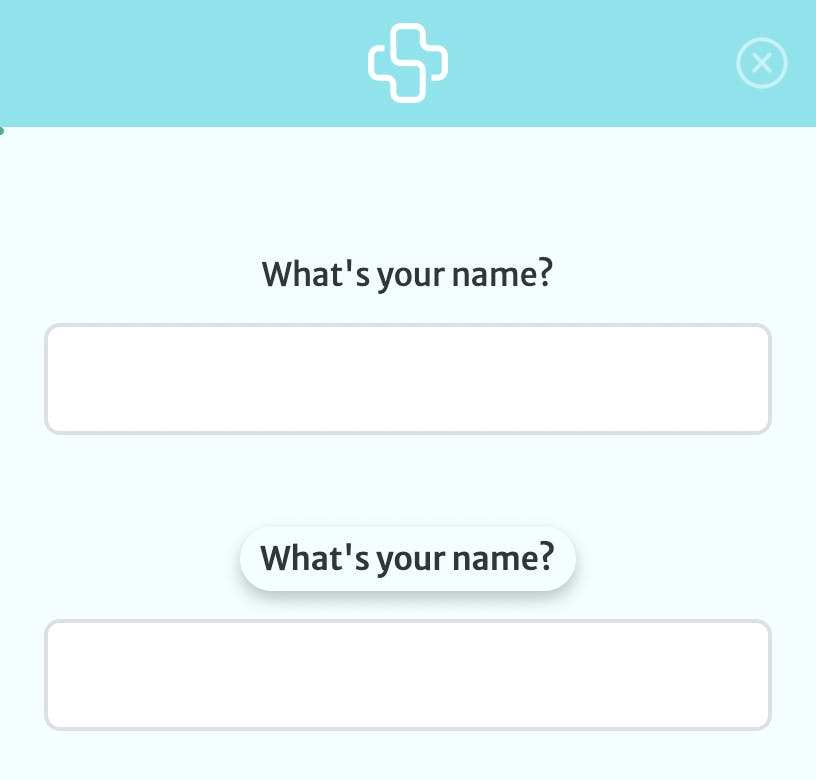
You can take a basic question and kick it up a notch with custom HTML and inline CSS. For example, by creating an HTML div right inside the question, adding some CSS styling, and placing the question text within it, you can really make it stand out.
Watch our How to video on custom HTML and CSS here.
Custom CSS
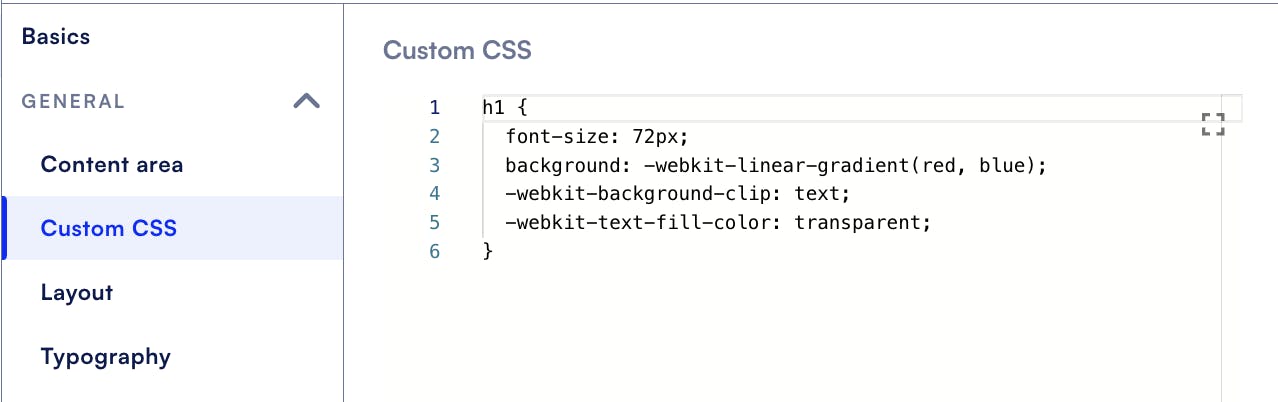
You can also customize styling using one of our newest features: Custom CSS. For example, you can add some color to all your Heading 1 texts by going to Theme -> General -> Custom CSS.
Add the desired CSS into the field.
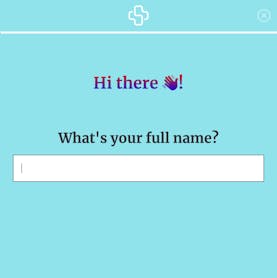
And voila! You have this cool gradient-colored emoji greeting.
Watch our How to video on custom CSS here.
5. Use group override style to change layout between pages
The utility of group-level style overrides
Does your design have some pages and elements that are not fully consistent across the form? Maybe you want to create a loading indicator page that displays while you process data in the background. Or perhaps you want to insert interstitial pages between questions or sections of your form. You might even want to display product recommendations or scheduling options at the end of the form. For these distinct pages, you might want to remove the progress bar or other elements that appear on most of your form pages.
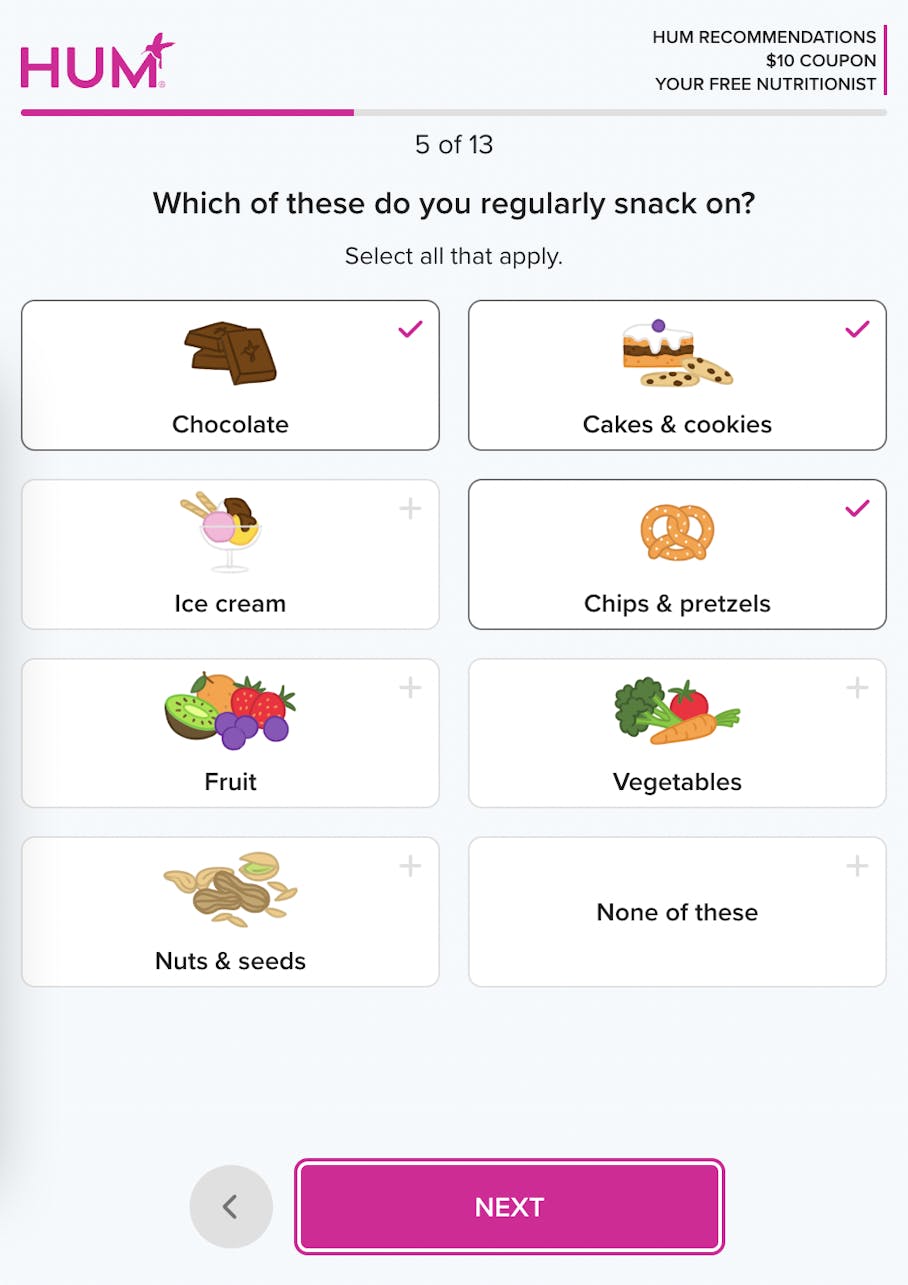
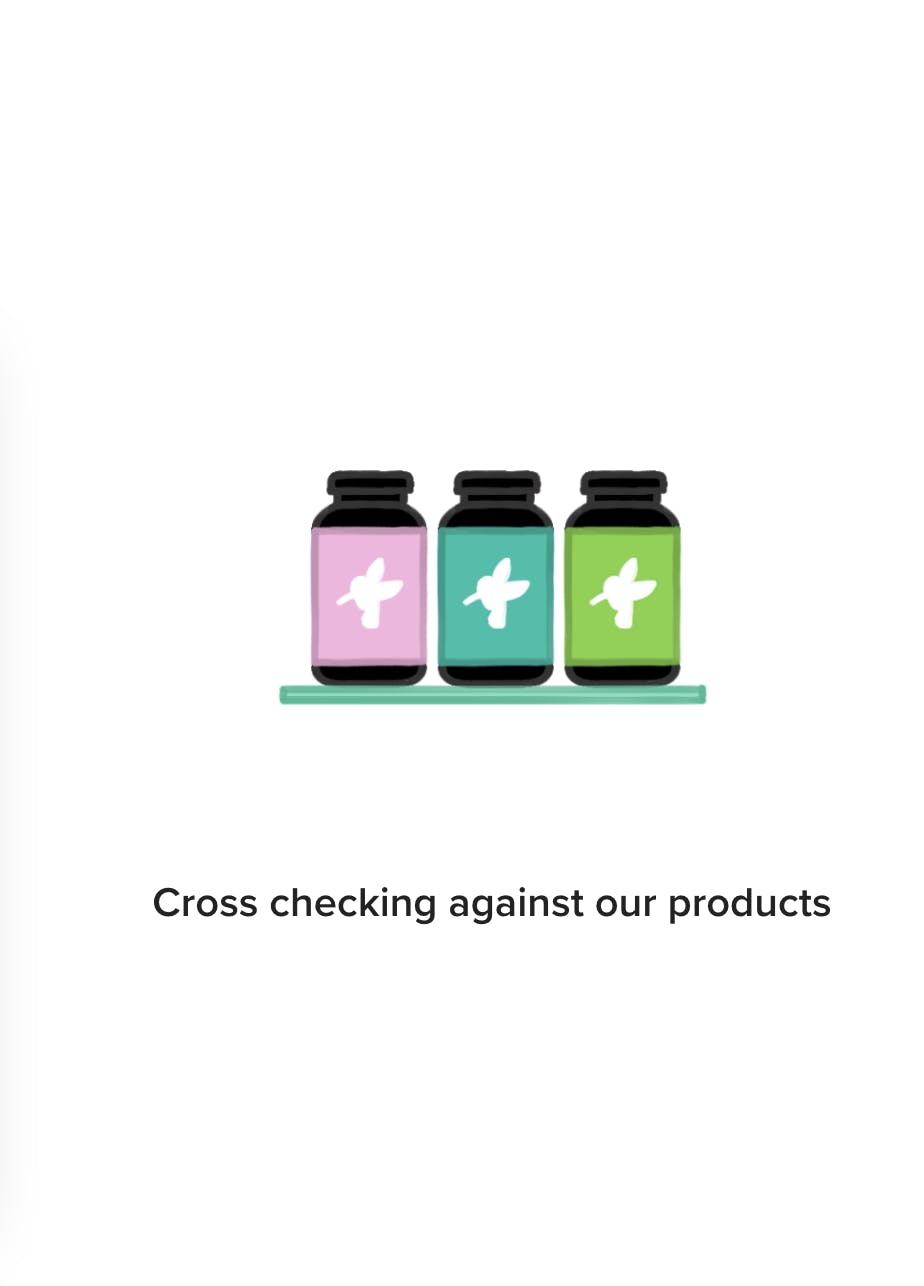
Group override style is a great tool in this situation. Hum, for instance, has a consistent layout throughout its form, with their logo, progress bar, and a promotional message at the top. In contrast, the loading indicator page has a short message and simple image, with none of the standard layout features of the rest of the form.
How to apply and customize group style override
First, you’ll want to create a new group of questions by clicking Groups -> +Add group. Groups can be named any way that is logical for you.
A group can have one or more questions, informational pages, dynamically populated messages, etc. Steps (pages) in a group will be displayed sequentially. So that means if you want steps 5 and 10 to be interstitials that have the custom design, you’d create a group for steps 1-4, a group for 5, another group for 6-9, and a group for 10.
If you go to the Style tab for any of your groups and click on Edit default style, you’ll see the layout you’ve set up for your entire theme (under “Themes”).
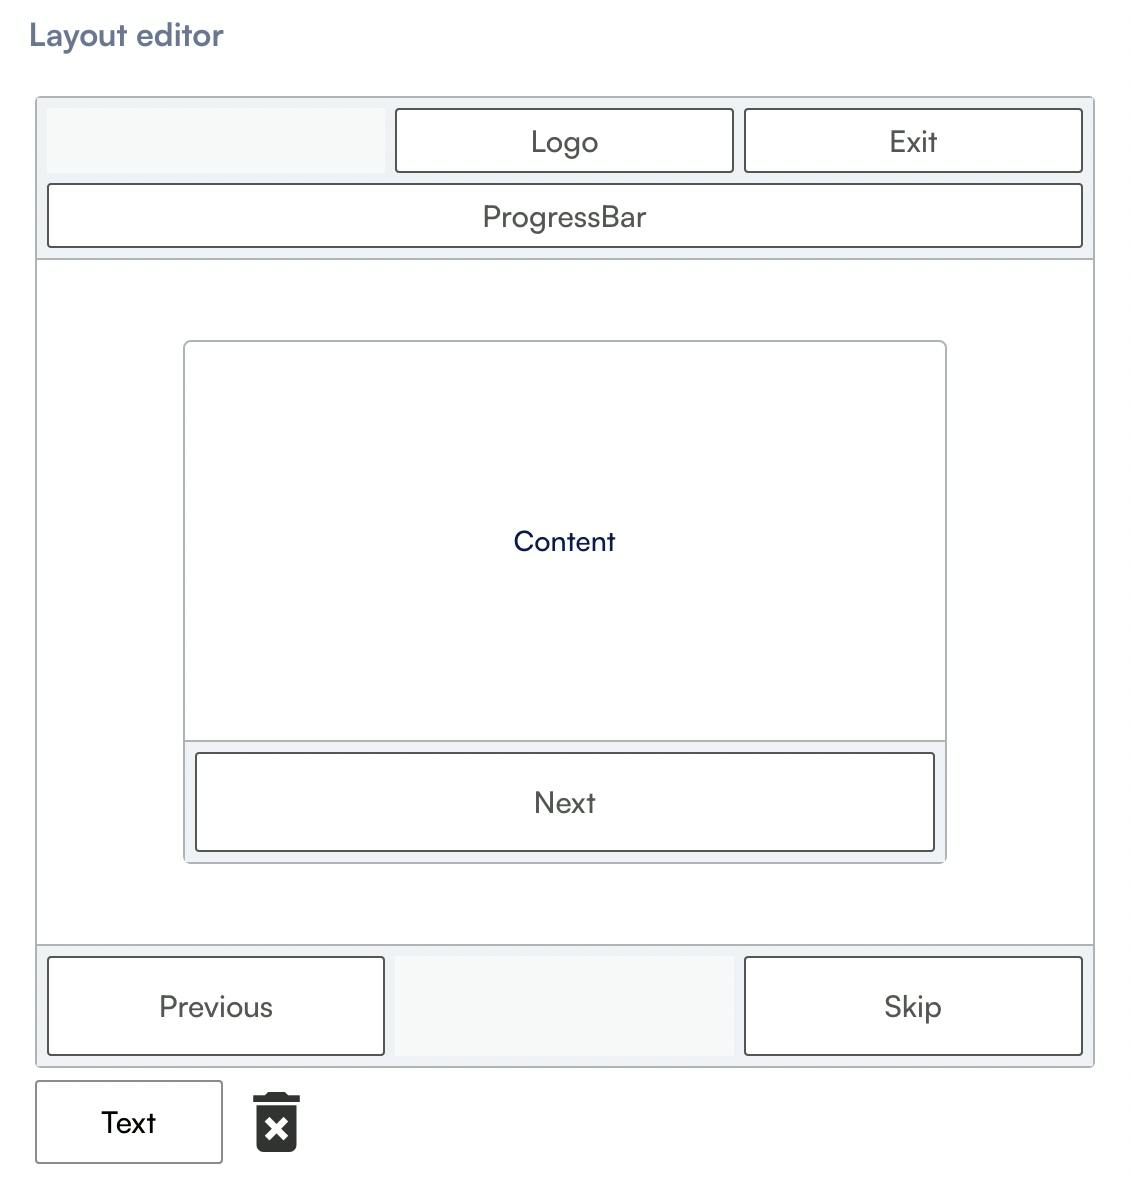

To design a page with a custom look you’ll want to override the style that is inherited from your theme. Enable the Override default style toggle, under the Style tab (of the group), and click Edit style override.
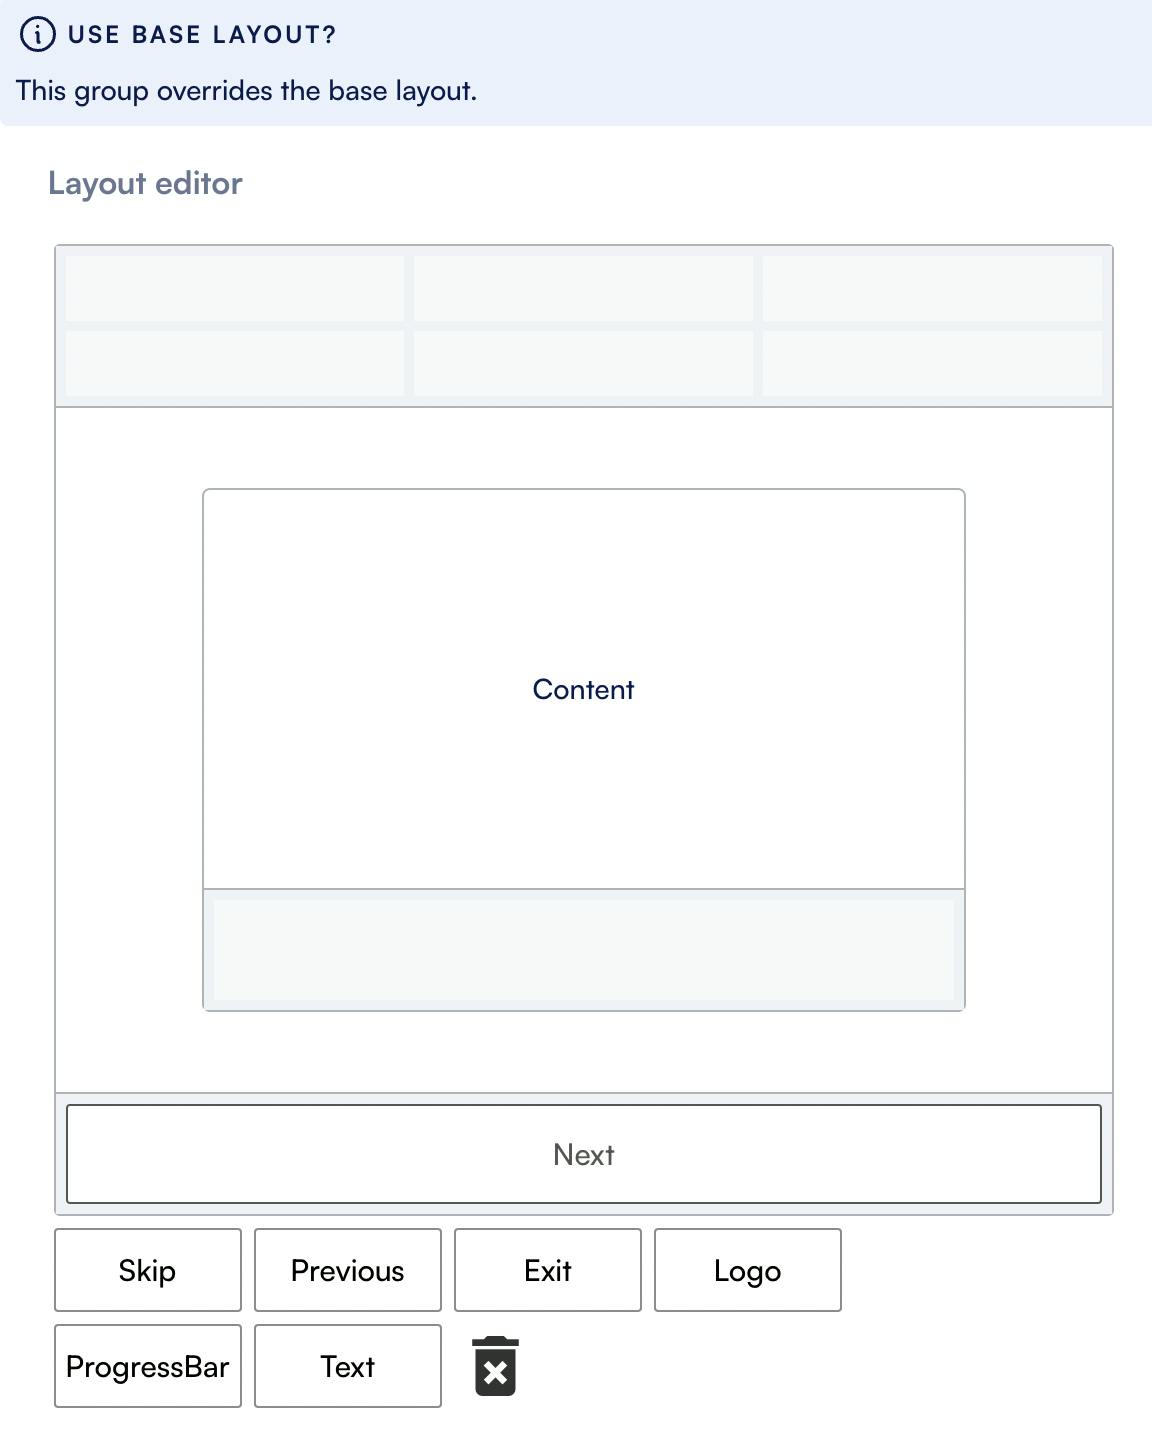
In the pop-up that appears, you can now make any changes you want. If you want to create an interstitial that has a clean design and no progress bar or logo, for example, go to General -> Layout. You can remove any of the default elements to create a page layout that stands out from the rest of the form!
Watch our How to video on group overrides here.
6. Returning responder behavior configurations
How you can make sure returning responders continue their form with Formsort
Today, people are starting and stopping their online browsing throughout the day, opening and closing tabs, then returning when they get a chance. You want to make sure that your responders can continue where to fill out their form if they drop off for some reason. You can leverage Formsort’s default returning responding behavior, which is set to Start at the furthest point for just that reason. This setting saves all responses entered so far and lets the user continue from the point where they left off.
There are two other settings you can select from, depending on what your needs are:
Start at the beginning, discard answers: If you've made significant changes to the form's content or structure since the returning responder's last visit, starting from the beginning ensures that they see and respond to the updated information. Discarding their previous answers prevents confusion or inaccuracies resulting from outdated content.
Start at the beginning, keep answers: This option sends responders to the beginning of the form but saves all their answers. This makes sense if you want returning responders to reevaluate their previous choices or responses, especially if there are time-sensitive questions like responders’ current mood.
Setting up returning responder behavior
A couple of quick clicks will let you enable the returning responder behavior you’re looking for. Under your form Settings -> Behavior, you’ll see the default behavior. Click on the arrow to see the other options and select the right one for your form. You can also adjust other settings like enabling restart or close once the flow is completed.
Watch our How to video on returning responder behavior here.
Build superforms with Formsort’s hidden powers
Forms are the gatekeepers of data and user interactions. Making them efficient, engaging, and user-friendly is essential for optimizing their performance. Formsort has a ton of hidden features and cool functionalities that can transform the way you design and use online forms–from conditional logic that tailors the user experience to dynamic content that keeps your forms fresh.
Dive into Formsort, explore these features, and put them to work for you. Whether you're enhancing user engagement, streamlining your customer feedback process, or simplifying data collection, there's a feature waiting to make your life easier.
Better forms improve conversion rates, collect more accurate data, establish brand credibility and trust, and enhance your organization's workflow. Build your next form with Formsort.